
First, you have to buy your supplies. I bought a blank canvas 24" x 48". I found out that Hobby Lobby will still take a 40% off coupon if you show it to them on your phone, so I got it for 40% off. Whatever you do, don't pay full price for your canvas. Also, I got some paint (whatever color you like for the edges), Scrapbook paper, paint brushes, mod podge (I bought the off brand and it worked fine) and Sharpies (Don't buy these at the craft store, you can get them at The Dollar Tree for a 1/4 of the price.)

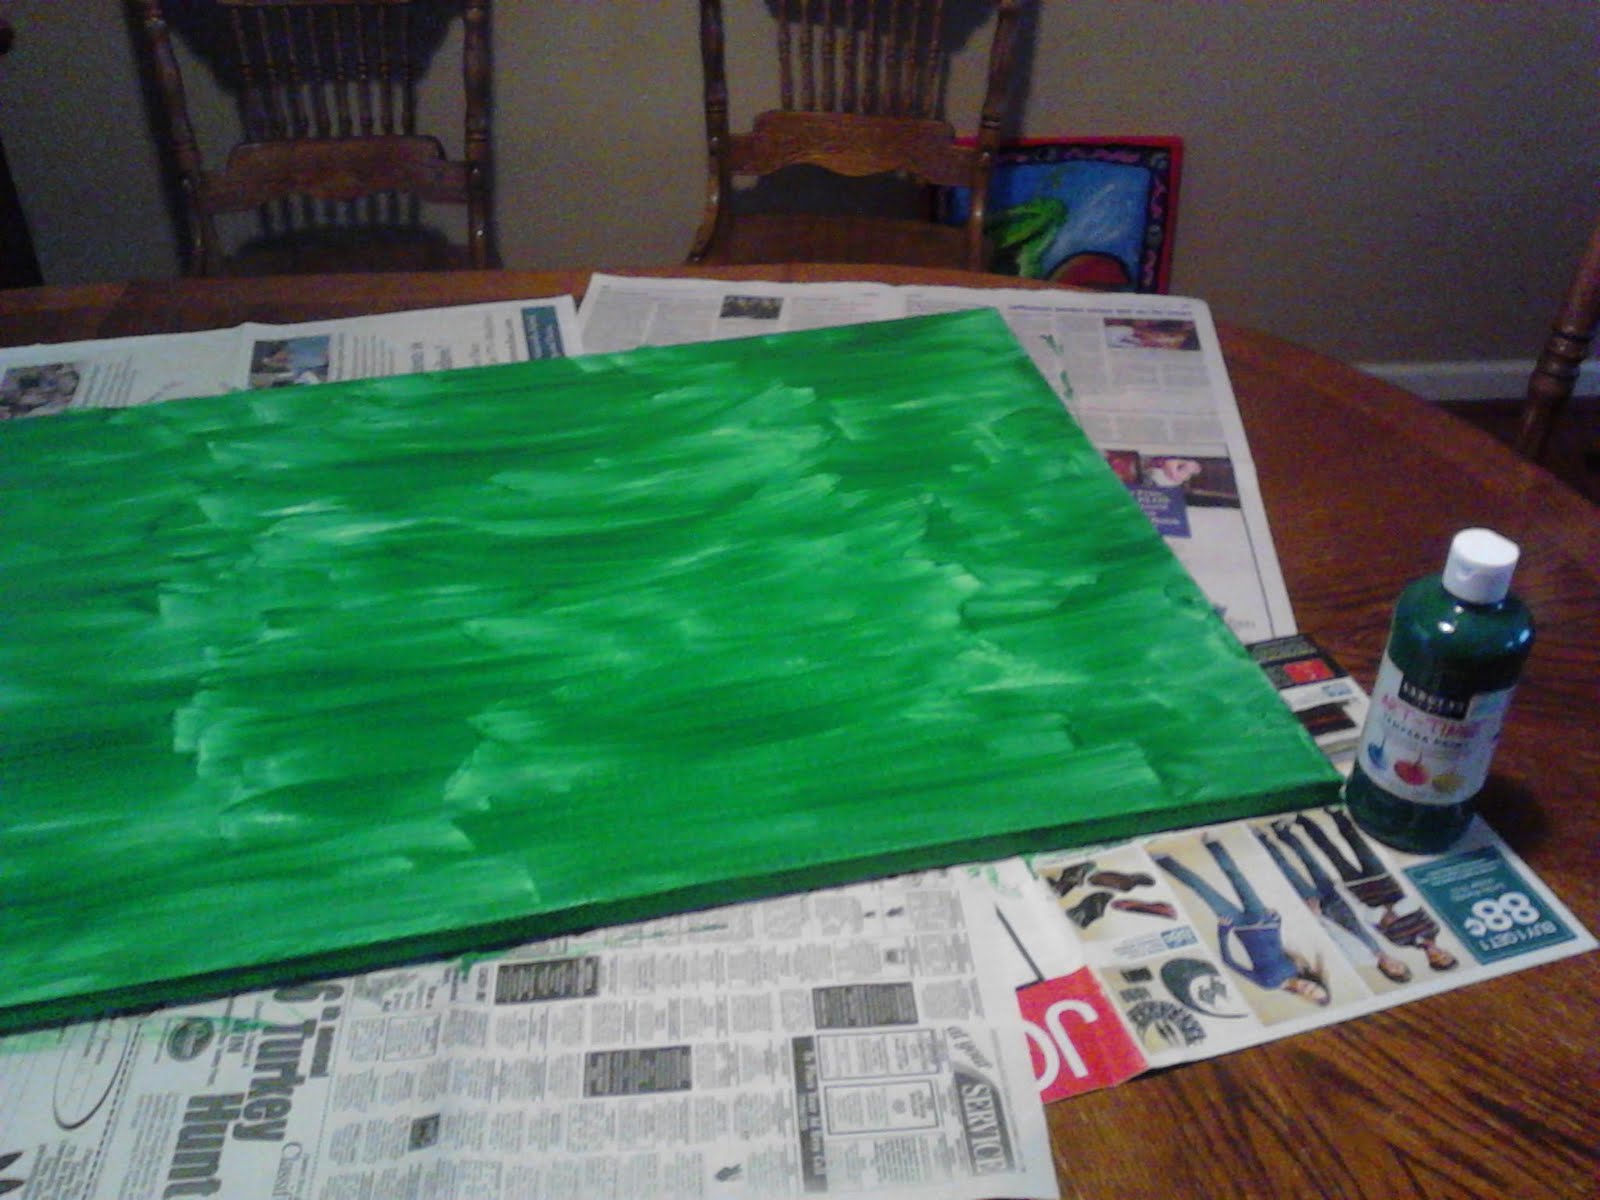
So, a lot of the ladies who have done this project said that paper shopping was the fun part....not for me. I found it to be overwhelming, but I am not really a scrapbooker either. So, this could be the best part for you. The first thing I did was to lay out the paper in the order that I felt looked most appealing from top to bottom. Although it is not matchy matchy, I wanted it to sort of flow from piece to piece. After my moment of organization I let my inner artist free. I ripped the plastic off my canvas and I got to work with my paint. I felt like a professional painter....Picasso, Degas, Monet....An Arteest if you will...I call it "Field of Grass". Unfortunately I had a choice to make, hang my masterpiece or finish my project...I couldn't afford another canvas, so I had to cover my artwork in order to finish my project. I found out that if you buy cheap tempera paint, you will need to paint at least two coats because this is what it looks like after one. It doesn't need to be perfect though, since most of it will be covered anyway.
Next was the fun part for me, I downloaded fonts...there are THOUSANDS of free fonts out there in internet world, it is truly amazing I just googled free fonts and found all sorts of fun stuff. I actually spent most of one day on the font part and, after hours of looking at and downloading all of the fun fonts and, wishing there was time for more, I got started. The first problem I encountered was that most scrapbooking paper is 12" x 12". and wouldn't fit in my printer, also, my canvas was 24" wide. So, I played around in open office (I currently don't have word, but the program I used was the OO version of power point.) I had to play around with it a lot, but I finally managed to make a template that was 6" tall by 24" wide. I then cut each piece of paper in half and configured it to print on 2 pages and then taped them together....there is probably a better way of going about this, but I had to do it any way I could figure out (comments about better ways are welcomed). Here is a screen shot of my first slide.

I typed all of the rules out in no particular order and figured which font should go with which rule. It is important in this step to know the difference between Their and there & also your and you're & lastly Too, to and two. In life it is also important to know these differences as well as the difference between lose and loose. I win, you lose.....My pants are very loose. Now you know!

I used a scrap piece of scrapbook paper and did a practice run. I did the wavy cutting after I had printed it and taped it together.

Important Note Here!!! Don't glue your paper down until you have laid it all out and made sure that everything fits and flows, I didn't figure that out until about the 6th sheet when I realized I had a lot more rules left than I had room...OOPS! It's okay though, I made it work.

Another important note, make sure you have plenty of ink. I ran out of black ink about half way through and didn't feel like going to get more, so I printed in color and colored over it with sharpie. This was a very long and painful way of avoiding a trip to Walmart.


This was also hard, because some of the fonts I was using were not solid, and I had to figure out a way to make them look the same without just coloring them in solid, which I could have easily done if I weren't an arteest. For this particular font (I believe it is called candy shoppe) I used a pen and colored it in very painstakingly to make it look like it was painted on and weathered. It took hours....really....


So, after I arranged all of the strips of paper, I glued them on with the decoupage and then I painted over the whole thing with more decoupage to seal it in. You may also notice that I used some of my left over edges glued down the sides to give it a more finished look since, for some odd reason, all of my edges weren't even. I have also read that others have used ribbon for this...I am too lazy innovative to go find need ribbon.

In case you can't read them, here are my rules:
Solis Family rules
Love the Lord Your God
Pray without ceasing
cuddle when you're sad
Thank God for this day, this family, this home
Never give up, you mustn't quit
Try new things with an open mind, you never know what you'll like
Always tell the truth
forgive easily
keep your promises
work cheerfully
sing silly, dance crazy, hug often, smile a lot
Encourage your siblings...Share in their joy
Use your manners...Yes, Please & No, thank you
Always say "I Love You"
Share everything...except bad ideas
Love Others
Choose whom you will serve
Be thankful, eat together, clean up after yourself
Husband, love your wife
wife, Always be on his side
Make the wise choice
Use Gentle Words
Now, go and be inspired to create!!!! Or just call me and I will make one for you for a price.

